12 Tips for Successful 3D-Printing
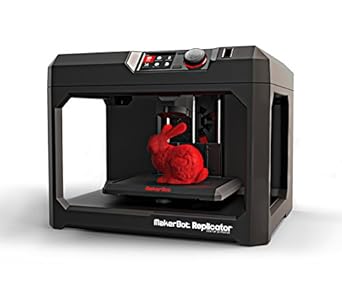
 So you bought a fused form filament (FFF) 3D printer such as a FlashForge or a MakerBot, and your first print turned out great!
But it’s just gone down hill from there, right? Here’s what went wrong and how to get back on track with great prints.
A dirty nozzle attracts filament clinging, which ruins prints. Clean your nozzle with acetone if it has accumulated gunk. Learn how to remove your nozzle and clean it by soaking it in acetone (nail polish remover) to remove old printing filament. Use an appropriately sized drill bit (usually 0.4mm) with your fingers to clear the nozzle if necessary.
Any dirt, moisture, or oil (such as fingerprints) on the build bed surface will prevent first layer adhesion, which will ruin your prints. Cover the build bed in an even layer of blue painter tape for an absolutely clean surface every time—but don’t touch the tape! In fact, tear off the first foot or so and discard it, because the outside of the roll has collected dirt, moisture, and oils just sitting around. When you apply the tape, touch only the left and right edges, and overlap the build board so you only have clean tape for the build.
Print in ABS. ABS has by far the best viscosity and flow characteristics for 3D printing, and low to no smell. PLA is the next best bet. All other plastics, including HIPS, Polystyrene, PVA, and blends are experimental and for those who know how to disassemble and reassemble their extruders only.
Use a heated build-bed. If you don’t have one, get one; most 3D printers have them or have an option.
Use an enclosed printer. Not only is it safer and quieter, but also keeps the entire chamber warm and prevents drafts from cooling your model unevenly, which can cause curling and warping. Don’t have an enclosure? Print under a clear plastic box.
Level your build bed every time. For ABS, the correct nozzle-to-bed thickness is .2mm, the thickness of a piece of regular printer paper. Adjust your printer’s nozzle to bed thickness by putting the paper on the bed moving the nozzle to at least three different points, and adjusting the bed height until they paper can move with resistance between the bed and the paper.
Print only one object at a time, in the center of your bed. While your printing software will allow you to build multiple objects at once, it doesn’t save you any time and it dramatically increases the probability that when something goes wrong, it will go very wrong. Printing one object at a time keeps you involved and watching the printer. Heated beds are also cooler towards the edges, making adhesion in those areas trickier.
Save large, complex, overnight builds for when you are an expert. These builds have a lot of opportunity for problems, and if they happen while you aren’t around, you could wind up with a clogged nozzle and a difficult extruder repair. Wait until you’ve got 3D printing down pat before you do your 3D print of Rome.
Be ready to pluck off any extrusion from the nozzle just before your print. A “snot nosed” extruder at the beginning of a build can drag around plastic and ruin what would have been a great build. As the extruder heats up, it may extrude a little plastic. Be ready to pluck that away with some tweezers before the print starts.
Take your printed part off the bed right after its done printing, or reheat the build bed to remove them. It’s much easier to remove a warm item. If you damage the painter’s tape at all while removing an object, take it off, wipe the bed surface with a paper-towel and acetone to clean it, and then re-apply painter’s tape.
Configure your printing software to print a “fence” around the first few layers of the print. The fence provides early warning of any adhesion problems and insulates the warm air around the nozzle to keep the first few layers viscous and more likely to adhere. You may also want to look into printing rafts or “mouse-ears” on corners to help them adhere, but I’ve never found that necessary—fences work well and aren’t connected to the object so they don’t require finishing.
Watch the first ten layers of your build directly and stop the build if there are any adhesion, curl, movement, or nozzle extrusion problems. These problems will not correct themselves; they’ll accumulate until you clog a nozzle-requiring repair. Once the first ten layers are down correctly and look good, the rest of the print is highly likely to succeed.
The difference between a good printout and something you have to throw away are these few details. When you pay attention to these few details, you can guarantee a good printout every time.
