The Gadgets Page

December 11, 2008

National Geographic Sling Bag

Filed under: Cameras,Misc. Gadgets — Laura Moncur @ 5:00 am

I know this bag is meant to hold cameras when you’re out on a safari or something, but I’m pretty stoked about this National Geographic Sling Bag. It is the perfect shape to wear over your shoulder or around your body.

National Geographic Sling Bag by LauraMoncur from Flickr

There were pockets for things like cameras, keys, money, etc.

National Geographic Sling Bag by LauraMoncur from Flickr

There is a pocket on the strap that is large enough to hold an iPhone with room to spare. It’s easy to take it in and out.

National Geographic Sling Bag by LauraMoncur from Flickr

Most importantly, it doesn’t look girly. Try as they might, a lot of camera bags look like glorified purses to me. I don’t even like my purses to look very girly, so this bag is PERFECT.

National Geographic Sling Bag by LauraMoncur from Flickr

Plus, I like the National Geographic logo. It makes me think that I might be going on a safari at any time. For a lightweight bag to use on a daily basis, the National Geographic Sling Bag is perfect.

December 9, 2008

Telescopic Lens For Your iPhone

Filed under: Cameras,PDAs and Phones — Laura Moncur @ 5:00 am

SNY iPhone 3G Camera Telescope Lens with Crystal Clear Case at Amazon.comThere’s no arguing that the iPhone camera lens is wimpy. The camera itself has more pixels than my first digital camera, but the lens is smaller than a dime. This iPhone case from SNY, however has a detachable telescopic lens.

I tested something like this at CES last year, but their design glued a magnetic circle to the iPhone instead of incorporating the lens holder into a case. Here are some other photos:

SNY iPhone 3G Camera Telescope Lens with Crystal Clear Case at Amazon.com

SNY iPhone 3G Camera Telescope Lens with Crystal Clear Case at Amazon.com

If you have been wishing that you could get 6X zoom with your little iPhone camera, this is a pretty lightweight accessory to add.

October 6, 2008

Take Better Macro Shots with the Griffin Clarifi

Filed under: Cameras,PDAs and Phones — Laura Moncur @ 5:00 am

Griffin Clarifi at Amazon.comIf you have a iPhone, then you understand how difficult it can be to take close-up photos. Fortunately, Griffin has a solution for you. The Griffin Clarifi is an iPhone case that has a macro lens that slides over your normal iPhone lens.

Nicole Lee has been trying out her Griffin Clarifi. She said:

The Clarifi claims to improve macro close-up shots of the iPhone’s camera, and as you can see in the Before and After shot, it definitely makes close-up pics appear clearer and more in focus.

She provided a photo to show how well it works:

Griffin Clarifi WORKS by Nicole Lee on Flickr

The Griffin website has another example:

Griffin Clarifi

There are so many times when I really need my iPhone to be able to snap a good photo, so this would come in handy for me.

August 15, 2008

10 Ways to Make Your Digital Photos Last Forever

Filed under: Cameras — Michael Moncur @ 12:20 am

This could happen to you.Photographs taken with film fade with age, and even negatives yellow and become brittle. Digital photos, on the other hand, retain the same brilliant color and clarity every time you pull them up on the computer screen—until your hard disk crashes and you instantly lose every photo you’ve ever taken.

Yes, digital photography has its share of disasters, and that leads some people to distrust it, or even to claim that film lasts longer than digital. But the good news is that your digital pictures can last forever if you take good care of them. Here are 10 rules to follow to make sure you don’t lose pictures to a digital catastrophe:

1. Use a quality memory card.

Start with the “film” your pictures are stored on: the memory card. While the cheap memory cards offer a huge capacity for a small price, it’s best to pay a bit more and get a quality card. A card from a good manufacturer will have less risk of data corruption or other failures. Sandisk, Lexar, and Kingston are good choices.

  • Tip: Buy two smaller cards instead of one larger one: for example, two 1GB cards instead of one 2GB card. This will often save you money, and you’ll also have a hedge against data loss—one corrupt card will only affect half of your photos.

2. Get those photos off that memory card.

You might have a huge memory card in your camera that can store thousands of photos, but you should still consider the memory card temporary storage—a memory card can fail, or can be lost or stolen with the camera. Whenever you finish taking a batch of pictures or return from a trip, use a card reader or USB cable to transfer the pictures to the computer.

3. Don’t delete photos in the camera.

Your camera probably has a convenient “Delete” or “Trash” button. I suggest you never use it. There are three reasons for this:

  • You avoid accidentally deleting the wrong picture, or accidentally using the “delete all” option.
  • I find it helpful to keep all of my photos, since even the “mistakes” could turn out to be the only photo of something important, or a “happy accident” that is good in its own way.
  • Can you really determine which photos are good or bad by looking at your camera’s tiny screen? It’s much better to transfer them all to the computer, then decide what to keep.

4. Don’t delete photos at all.

For that matter, why delete photos at all? I keep every photo I take with my digital cameras: the great shots, the out-of-focus shots, the mistakes, the duplicates, everything. Even the bad ones are useful years later for documenting my vacations and remembering what I saw, for seeing how my photographic technique has improved, or for seeing whether a camera is working as well as it used to. This also ensures that I never delete the wrong photo. If there’s a gap in the numbering on my original photo files, I know something’s missing.

If you don’t have room for all of your photos on your hard drive, remember that hard drives are cheap. You can also archive the old ones to CD or DVD media.

5. Keep a Backup. Or two.

Did I mention that hard drives are cheap? I recommend keeping two copies of all of your original photos at all times. I have a daily backup script that copies the new files to an external drive. Be sure to use a separate drive or another computer as your backup, to avoid losing photos in a drive crash.

If you want to guarantee you won’t lose photos, you should also have an off-site backup—use an online backup service, upload them to a server, or just drop off a few DVD-ROMs at a friend’s house. That way your photos are protected even if you have a house fire or other disaster.

6. Use generic photo formats.

Most cameras store images in the standard JPEG format, which should be easily readable for many years. However, higher-end cameras usually have a RAW format option. While raw images are great for post-processing and often beat JPEG in quality, keep in mind that all raw formats are proprietary, and you may have trouble opening these files 10 years from now. It’s best to save a standard JPEG or TIFF version of each photo, even if you use RAW. Some cameras can save a JPEG file along with the RAW file, giving you the best of both worlds.

  • Tip: If you are serious about your photography and insist on using RAW format, keep a backup copy of the software you use to process the files. You might need to install it on an antique PC 10 years from now to access an old photo.

7. Don’t edit original photos.

If you use a photo, you’ll often resize, crop, or otherwise process it. This is fine, but the first thing you should do when editing a photo is save it to a new file. Keep the original, unprocessed, full-resolution file along with your edited version. This will make it easier to use the photo for a different purpose later, and it also avoids the costly mistake of overwriting a photo with a messed-up version. Back up the edited version too.

  • Tip: Unless you’re very careful and use special software, overwriting a photo will erase the EXIF data that the camera stored with the photo. This is your record of the date and time the picture was taken and the camera settings used.

8. Don’t trust someone else with your photos.

Online photo sharing sites like Flickr are great for sharing photos, but avoid the temptation to use them for storing photos. Don’t trust an online service with the only copy of your photos, or even the backup copy.

Online services might go out of business, and they don’t guarantee that your data will be safe—especially if you forget to pay the bill. They also almost always process the photo (resizing, etc.) when you upload it. Use these services to share pictures, but don’t expect them to last forever there.

9. Test and maintain your backup files.

A backup copy is no good if it doesn’t work, or if you lose access to it. Here are a few tips for making sure your backups will back you up:

  • Take a look at your backup files regularly, and make sure you can load a few photos.
  • If you back up to a hard disk, check the disk for errors regularly.
  • If you back up to CD-R or DVD-R, use quality backup media.
  • Test CD or DVD backups every month or two.
  • Once every year or two, copy CD or DVD backups to brand new discs. Media has a lifespan potentially as low as 5 years.
  • If you get a new computer, be sure to move the photos from your old computer, and make sure you still have two copies.
  • If CD or DVD formats are going away in favor of some kind of new Super Blue-HD discs, copy your files to the new media as soon as it’s practical.

10. Label, organize, and sort your photos.

If you follow the above rules for 20 years, you’ll end up with thousands of great photos—and now you have a different problem. Finding a few pictures of “that one time we went to Yellowstone” could be virtually impossible when you have thousands of photos stored in a disorganized mess of folders.

At the very least, do what I do: store each batch of photos in a separate folder with a descriptive name beginning with the date. Here are some examples:

  • 2006-05-10 Yellowstone Park
  • 2006-08-22 Testing new Camera
  • 2006-09-01 Elvis sighting at Caesar’s Palace
  • 2006-12-26 Opening Christmas presents

I avoid renaming the photo files, since I consider them my “negatives” and want a complete record of the pictures I’ve taken. Instead, I store them in folders like the above, then group those into larger folders for each year. This makes it easy to find particular photos, and the pictures are in convenient groups for archiving to DVD-ROMs every few months.

You may even want to move the best photos (or the ones you’ve chosen to print) into a separate folder within each folder, especially if you’re like me and you have more “misses” than “hits”.

If you want to go one step further, you can catalog your photos with a program like ACDSee, which lets you store a title, description, keywords, and rating for every photo. That would make it even easier to find what you’re looking for, if you can find the time to label and rate each picture.

July 1, 2008

3D Image of the Flag Raising at Iwo Jima

Filed under: Cameras — Laura Moncur @ 5:00 am

Click to see full size.In honor of Independence Day, here is a 3D image of the flag raising at Iwo Jima. We all know the famous photograph from World War II, but the filmographer who DIDN’T win a Pulitzer Prize, Bill Genaust, was standing right next to Joe Rosenthal. Using a frame from Genaust’s filming, we have documentation of a single historical moment in time from two different perspectives. You can use the two images to create a 3D image.

Read more here:

By juxtaposing Rosenthal’s photograph with the matching frame from Genaust’s film, it is possible to produce an authentic 3-D image of the Iwo Jima flag-raising.

For the first time, we can see one of the most iconic moments in U.S. military history with a real sense of depth and spatial relationships.

The 3-D effects are not the result of digital manipulation or computer trickery. They are based on the same photographic techniques that have been used to produce stereoscopic imagery for more than a century.

A 3-D photograph allows the viewer to see a single image from two slightly different viewpoints, mimicking the natural separation of human eyes.

If you were good at those Magic Eye stereograms back in the Nineties, then you’ll be able to view the image without 3D glasses here:

Click to see full size.

My whole life, I have seen the raising of the flag at Iwo Jima over and over so many times that it seems fake to me now. There is a whole debate about whether this flag raising was staged by the reporters so they could get a good shot of it. It has been proven that it this icon was the SECOND flag raising on the island.

First flag raising at Iwo Jima
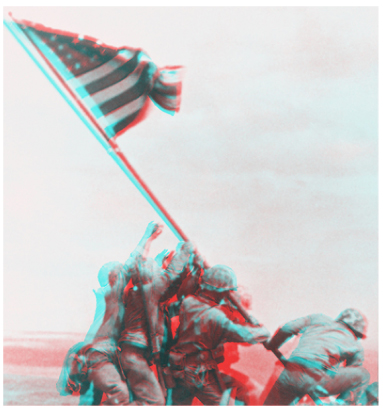
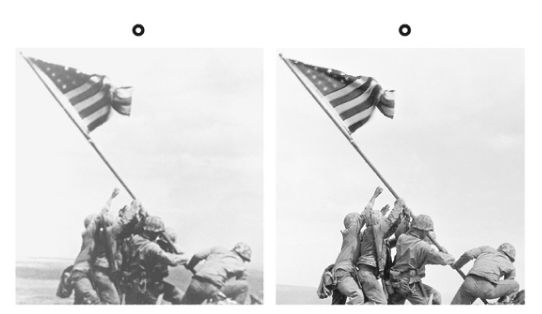
The first flag raising was photographed by a Sgt. Louis R. Lowry.

Wikipedia has some great information on this controversy:

However, the photo was not without controversy. Following the second flag raising, Rosenthal had the Marines of Easy Company pose for a group shot, the “gung-ho” shot. This was also documented by Bill Genaust.[24] A few days after the picture was taken, back on Guam, Rosenthal was asked if he had posed the photo. Thinking the questioner was referring to the ‘gung-ho’ picture, he replied “Sure.” After that, Robert Sherrod, a Time-Life correspondent, told his editors in New York that Rosenthal had staged the flag-raising photo. TIME’s radio show, ‘Time Views the News’, broadcast a report, charging that “Rosenthal climbed Suribachi after the flag had already been planted… Like most photographers [he] could not resist reposing his characters in historic fashion.”

As a result of this report, Rosenthal was repeatedly accused of staging the picture, or covering up the first flag raising. One New York Times book reviewer even went so far as to suggest revoking his Pulitzer Prize. For the decades that have followed, Rosenthal repeatedly and vociferously refuted claims that the flag raising was staged. “I don’t think it is in me to do much more of this sort of thing… I don’t know how to get across to anybody what 50 years of constant repetition means.” Genaust’s film also shows the claim that the flag-raising was staged to be erroneous.

There are some that use the film and the photograph to prove that they hadn’t been staged, but I have never understood the argument there. I don’t believe that a member of the press can be independent and just document what is happening in a war or any other event. Just being there changes things whether you photograph, film or write about them. It’s like quantum mechanics. Anything observed is changed by the observation.

Did Rosenthal stage that photograph? I don’t care. It’s impossible to merely document history without becoming part of it. Staged or not, Joe Rosenthal documented a moment in history and deserved the Pulitzer Prize he won for it.

Via: Iwo Jima flag-raising in 3-D on Flickr by BlogjamComic

February 5, 2008

Sanyo Xacti E1: First Time Under Water

Filed under: Cameras — Laura Moncur @ 1:46 pm

On our trip to Swami’s Beach to look at the tide pools, I finally tested my Sanyo Xacti E1 under water.

Here is a video of the first time I ever put it under water:

Click Here To See The Video

Download this video for your iPod

I got a lot of great footage with the Sanyo Xacti E1. You can see the best of our tidepooling adventure here:

January 23, 2008

Organize Your Life With Your Digital Camera

Filed under: Cameras — Laura Moncur @ 8:47 am

Patrick Norton at Tekzilla Daily had an EXCELLENT guide on how to organize your life with your digital camera. These are some great ideas and you can check them out here:

Here is a quick list of their ideas:

  • Travel Companion: If you’re visiting an unfamiliar country or city and don’t want to get lost, take pictures of your hotel building as well as the nearby street signs. If you end up getting lost or turned around, try showing these pictures to a friendly local who can point you in the right direction to get back home.

  • Use Your Camera As A Scanner: If you see important information that you need to jot down like a business card, a white board or a document. With today’s mega-pixel cameras, that image is going to be big and legible enough for you to read all that detailed information from.

  • History Viewer: Say you’re working on a complex project like repairing a car or remodeling a room with lots of steps and pieces. It can be insanely easy to forget how it goes back together. As you start, take a picture of every step along the way to see how things come apart. Keep doing it as you progress in your work. Take pictures every step of the way. If you get confused about how things go back together, you have a trail of photos that have the answer for you.

In addition to those ideas, I have a couple others:

  • Use your camera to keep track of your diet: When you are eating throughout the day, take a picture of everything you eat. You can use the photos as a food journal or just as a reminder so that you can keep your written food journal honest and accurate. This works especially well with a camera phone because it’s more likely to be with you at all times.

  • Comparison Shopping: Sometimes it’s hard to remember which store had the best deal, especially when you are looking for high price items. When you are shopping, take pictures of your favorite choices at each store along with the price tag. When you are at a different store, you’ll have a good idea what the same item cost at the store down the street. Be careful, some stores have policies against taking photos of their merchandise, so either ask permission or be discreet.

There are so many different ways to use your camera to organize your life. How do you use your camera? Leave us your tips in the comment field.

January 16, 2008

Ask Laura: SD Card Readers

Filed under: Cameras — Laura Moncur @ 5:00 am

Self Portrait Tuesday 01-15-08 from FlickrHi,

I just read your very informative article: Understanding SD Flash Memory Card Speeds.

One thing I’m still confused about is memory card readers — what are they and are they required? Would I be able to copy to my computer, delete, print, etc. just with a USB cable connecting to my computer directly or will I need a memory card reader?

Specifically, I’m thinking of getting a Lexar Platinum II 60x 2GB SD card for my Canon PowerShot a720.

Thank you very much,

Felix


Felix,

Your computer might already have a card reader. If it doesn’t, you can always connect your camera to your computer with the included USB cable. If you want to download your photos directly from your SD card, however, you need a “slot” to put it in. If your computer doesn’t have a SD card reader, you’ll have to buy one.

Best,
Laura Moncur


So if my computer doesn’t have a card reader, I can just use the camera as a sort of card reader by connecting the camera to the computer via USB, and then copying stuff from the SD card? What’s the advantage of getting a card reader?

Thank you


Felix,

The advantages of a card reader are a little nebulous.

Firstly, you don’t have to hunt down the USB cable that came with your camera. Most of those cables are proprietary, so if you lose it, you can’t just find another cable easily.

Secondly, some card readers download the photos a lot faster than your camera will. I’ve never tested your Canon camera, but with my old Canon (6 years ago), the compact flash card reader was MUCH faster.

Finally, sometimes the cameras make it difficult to download the photos by requiring software to be installed. If you have a Mac, I’ve heard that it’s MUCH easier, but sometimes things are a little difficult on a PC.

The most important thing is to download your photos to a computer and make a backup by burning a CD or DVD. That way you won’t lose your most important pictures.

Best,
Laura Moncur

January 7, 2008

CES Unveiled: Sanyo Xacti E1

Filed under: Cameras — Laura Moncur @ 5:00 am

CES Unveiled

At CES Unveiled, they were also highlighting the winners of the Innovation Awards. I was tickled pink to notice that my Sanyo Xacti E1 is one of the winners!

I talked about the E1 before:

They were showcasing the winners of The Best of Innovations 2008 by having the living statues from the Venetian holding them. Here’s a photo of me taking a picture of him with MY Sanyo Xacti E1.

Sanyo Xacti Waterproof E1 Wins Innovation Award

Here is the photo I took:

Sanyo Xacti Waterproof E1 Wins Innovation Award

If you were wondering what the sign he was holding said, here it is in detail:

Sanyo Xacti Waterproof E1 Wins Innovation Award

Congratulations, Sanyo! You really outdid yourself on the E1 and I love using it every day!

November 26, 2007

Ted Rheingold’s Not So Impressed with Eye-Fi

Filed under: Cameras — Laura Moncur @ 5:00 am

Eye-Fi Card, Wireless 2GB SD Memory Card at Amazon.comI’ve heard a lot of drooling about the Eye-Fi Card. It’s supposed to be a cool wireless SD card that can upload your photos to the Internet without the use of a laptop. I couldn’t understand why everyone was so excited about it because it looked like a $100 complication, not a simplification. I’m glad to know that my instincts were spot on.

The Eye-Fi has to be configured with each local network you use and you it can only be configured via the Eye-FI USB dongle. Worse the Eye-Fi software can’t play with most hotspots, free and hotel wifi points. So much for photos on-the-go without the laptop which was my primary desire.

The real let-down to me, however, is that the upload from camera to photo sharing site (in my case Flickr) will upload every picture on the card. You cannot limit it to just some. I’m too bad a photographers for that. Also the Eye-Fi currently does not support any of the config settings I use with Flickr, so all titles, descriptions, tags, and groupings have to be done manually at Flickr.com which i find to be time consuming.

It uploads EVERY photo on your card?! That is completely unacceptable to me. There are so many photos that I take trying to get just one good shot. That one good shot goes to Flickr, not the whole collection!

Thanks for the review, Ted. You’ve saved a bunch of people from an expensive mistake.

« Previous PageNext Page »

Powered by WordPress
(c) 2003-2017 Michael Moncur, Laura Moncur, Matthew Strebe, and The Gadgets Page