The Gadgets Page

July 24, 2012

How To Make Solar Tiki Torches

Filed under: Green Gadgets — Laura Moncur @ 12:01 pm

I really liked these solar tiki torches in this planter that I found on Pinterest:

Solar Tiki Torch Planter from The Gadgets Page

The problem is that when I looked at the cost for solar tiki torches, they were WAY too much money! The best price I found was $50 for a four pack, making them $12.50 each: Adamax TIKILED4 Solar Flickering Tiki Torches, 4-Pack at Amazon.com

Adamax TIKILED4 Solar Flickering Tiki Torches, 4-Pack at Amazon.com

It’s WAY cheaper to buy old school tiki torches like this 12 pack for only $33: Set of 12 Bamboo Tiki-Style Torches at Amazon.com

Set of 12 Bamboo Tiki-Style Torches at Amazon.com

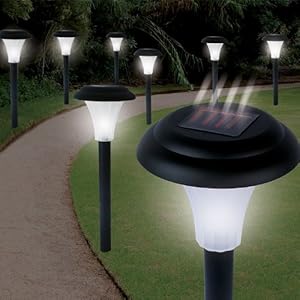
Remove the oil canisters in them and replace them with these inexpensive solar lights that are only $21 for an 8 pack: Garden Creations JB5629 Solar-Powered LED Accent Light, Set of 8 at Amazon.com

Garden Creations JB5629 Solar-Powered LED Accent Light, Set of 8 at Amazon.com

For less than $5.50 each, you can have solar tiki lights lighting up your backyard.

July 9, 2012

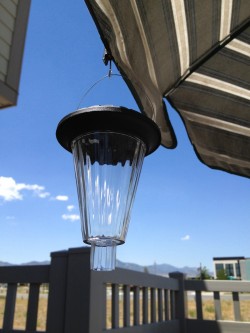
How To Make a Hanging Solar Light

Filed under: Green Gadgets — Laura Moncur @ 4:00 pm

Solar Light Glamping

Update 12-15-14

I have a few of these on sale on eBay right now. You can see them here:


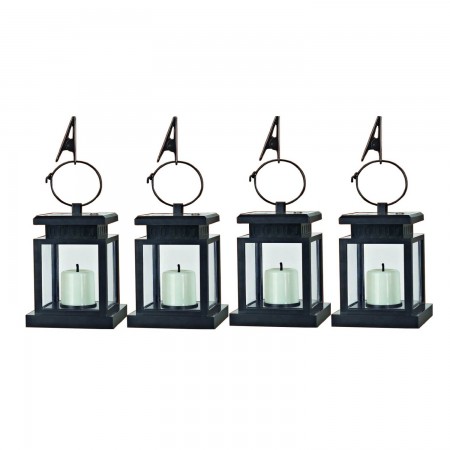
Nature Power Umbrella LightsI saw these Solar powered umbrella lights on Amazon and immediately loved them so much that I wrote an entry about them on Starling Travel.

My biggest problem with them was the COST. They seemed VERY expensive for only four lights when I can get solar lights at Home Depot for only two bucks apiece. So, I decided to create my own.

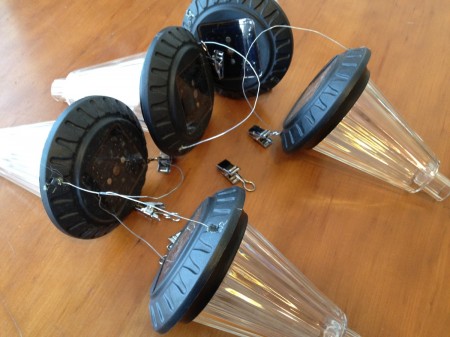
How to Make Hanging Solar Lights from The Gadgets PageI used parts I found at Home Depot, but here are some links to parts you can buy on Amazon that are similarly priced.

Parts

Tools

  • Wire cutter
  • Needle nose pliers
  • Drill with a small drill bit
  • Hot glue gun (and glue)
  • Screwdriver

Here is a video showing you how to make a hanging solar light.

If you take just a few minutes, you can have expensive looking solar lights to hang off your backyard umbrella.

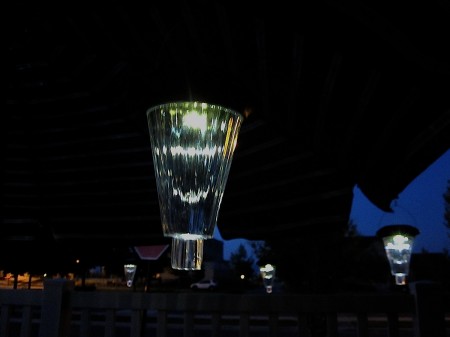
Update 07-10-12: I took some photos of them at night after they had a day to charge up and they look spectacular.

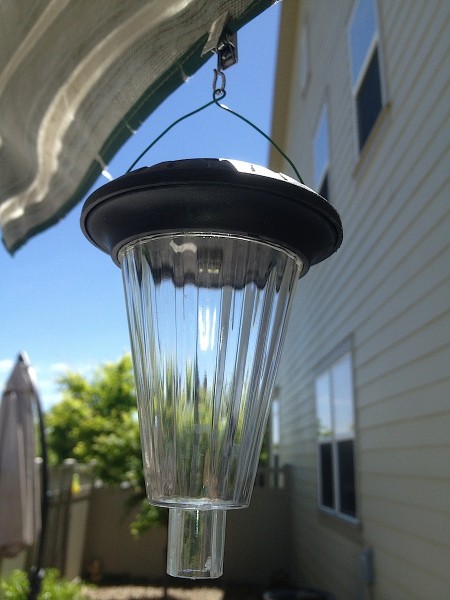
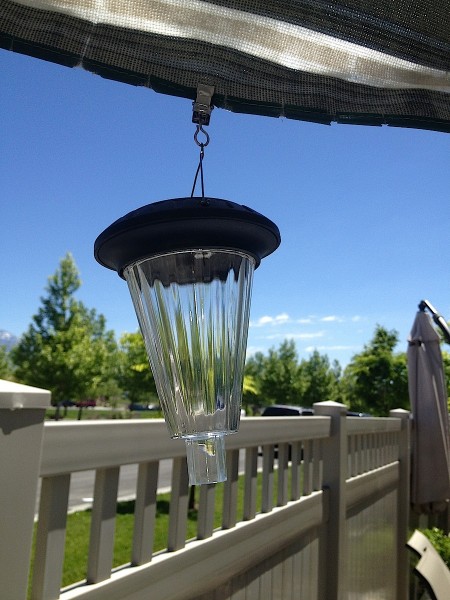
How to Make Hanging Solar Lights from The Gadgets Page

How to Make Hanging Solar Lights from The Gadgets Page

Update 07-24-12: If you live in a place that regularly experiences heavy winds (40 mph or more), these hanging lights will NOT work for you. After a wind storm last Sunday, I lost four out of the eight lamps that were hanging on my umbrella. The wind either broke them or took them away completely.

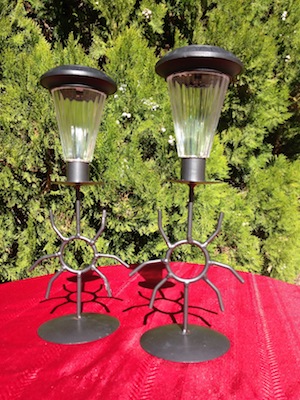
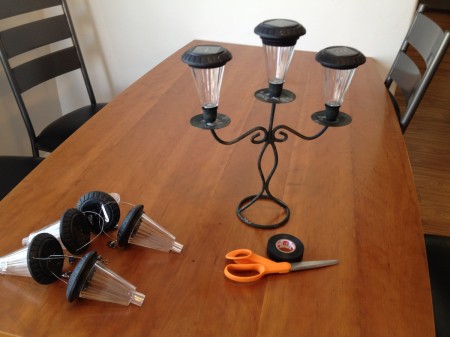
Solar Light Candelabra from The Gadgets Page

I decided to repurpose them into a candelabra instead. I brought out the old candlestick holder, put some electrical tape around the base of each lamp and tucked them into the spots where candles go.

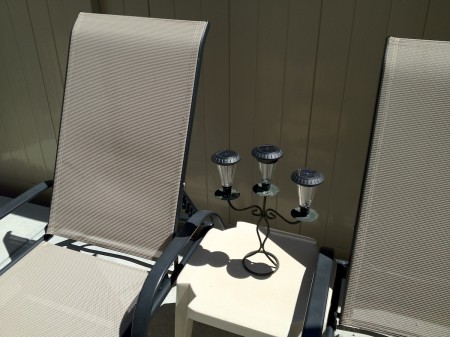
Solar Light Candelabra from The Gadgets Page

They look good and the candelabra is MUCH more stable in the wind.

Solar Light Candelabra from The Gadgets Page

If you don’t regularly experience hurricane force winds, then you’ll probably be okay with hanging solar lights. For those of us who live in a windy area, however, they just don’t work.

Update 09-13-13

This summer, I took all those solar lights and tried again with heavier wire (18 gauge). Not only did they last all summer long through heavy wind storms, they look better than they did before.

Homemade Solar Umbrella Lights from The Gadgets Page

Homemade Solar Umbrella Lights from The Gadgets Page

For these, I used 18 gauge green floral wire:

Additionally, I was able to secure the candelabra from the wind as well. I took two cord organizers that were left over from a wiring project on my camper.

Solar Candelabra held to the table with cord organizers from Gadgets Page

Solar Candelabra held to the table with cord organizers from Gadgets Page

These have worked great and I haven’t had the candelabra fall since I secured it, but I think it might have been a bit overkill. They probably would have stayed secure with these products without permanently affixing the candelabra to the table.

July 3, 2012

Eco-Amp: If They Really Cared About The Environment

Filed under: Green Gadgets,PDAs and Phones — Laura Moncur @ 8:58 am

Eco-Amp is an eight dollar piece of recycled cardboard that amplifies audio on your iPhone. Watch this video to see how it works.

The problem that I have with this product is that if they REALLY cared about the environment, they would have a template that you could download and print up on your used cereal boxes. THAT would really be an environmentally sound product. EVEN if they charged a couple of dollars for the template download, I would believe that they really cared, but since their only option is to pay them eight bucks for their recycled cardboard, I’m not buying their “green.”

In fact, here is a video of someone who has designed his own.

iPhone amplifier (Cardboard, do it yourself) from Alexei Konovalov on Vimeo.

Here is a bunch of free DIY iPhone amp techniques and their registered decibel levels:

I’m sure you could design something very similar to the Eco-Amp by cutting out your own cereal box. I urge all of you to do that instead of shelling out money and paying a mail truck to spew fumes and deliver an Eco-Amp to your doorstep.

Via Eco-Amp: environmentally smug sound | TUAW – The Unofficial Apple Weblog

Update 08-21-12

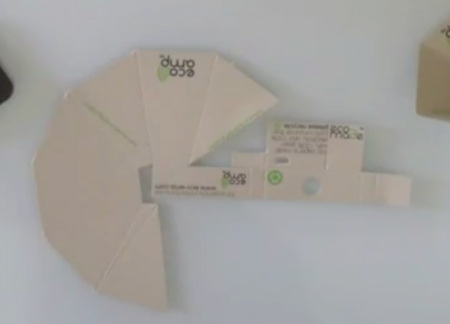
After thinking about this for a while, I realized that a screen shot from the video might be good enough if printed at the right size.

Click for full sized Eco Amp Screen Shot

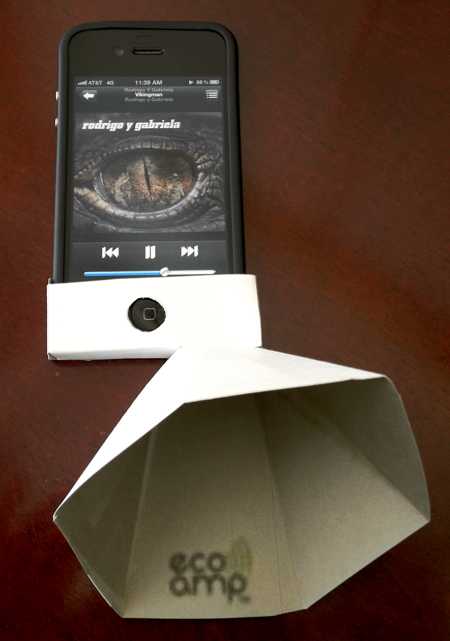
When I printed this image at 93% on card stock, I was able to recreate the Eco-Amp.

Eco Amp Template from Starling Fitness

The disappointing thing, however, is that it doesn’t really WORK. I didn’t notice much amplification at all from this little piece of cardboard and I’m wondering if the original would do any better. The audio from the video sounds as if it was electronically made louder, so even that demonstration is suspect.

I filmed the lack of difference in sound here:

Sure, you can print up your own Eco-Amp, but the difference in sound was so minuscule that it’s hardly worth your bother.

June 27, 2012

XDModo Solar Charger: How Much Is Green Worth?

Filed under: Green Gadgets — Laura Moncur @ 8:50 am

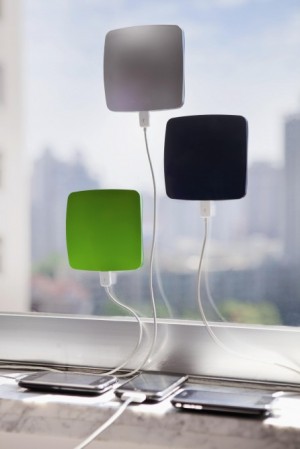
XDModo Window Solar ChargerThis photograph of the XDModo Window Solar Charger makes it look like a beautiful way to charge your phone using the power of the sun. When I read the review, however, it sounded like a colossal pain in the butt:

I guess I’m lucky that I now live in a part of the world blessed with long sunny days that are perfect for juicing up the battery on my solar device charger. I do have to keep getting up and moving it, though, so that the panels don’t fall into the shadows cast by furniture in the room or even the window frames themselves, and reducing its efficiency. Propping the charger up against the glass is one way to ensure maximum exposure to those energy-giving rays, but XDModo has a much slicker solution. Users can stick the 0.68-inch thick Window solar charger to the inside of a glass window with the photovoltaic panels facing out and then feed off a charging cable to a portable device positioned in the cooling shade.

When I read this review, I realized that there isn’t a window in my house that would work well with this charger. The windows of my house face AWAY from the sun to keep out the heat.

When I saw how much it cost to buy one ($69), I was shocked. A normal iPhone charger can cost as low as five bucks at the local gas station. That’s a HUGE markup, just for the window cling solar solution.

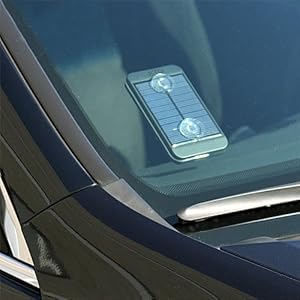
XTG Technology Premium Solar Charger at Amazon.comIf you really like this idea, buy the XTG Technology Premium Solar Charger for less than HALF the cost of the XDModo and they’ll throw in suction cups to attach it to a window.

Green products are great, but make sure you’re not paying extra for them.

Via: Lynsey Zahn on Pinterest: This is awesome & or I want that / window sticky solar chargers

January 29, 2012

CES 2012: Eton FRX3 Solar/Battery/Handcrank Charger

Filed under: Green Gadgets,Misc. Gadgets — Laura Moncur @ 1:00 pm

I have been looking for a hand crank charger for my iPhone for over a year now. I tried out so many of them and returned them to the store disappointed. The biggest problem is the consistency of power. The iPhone must have a consistent charge in order to work.

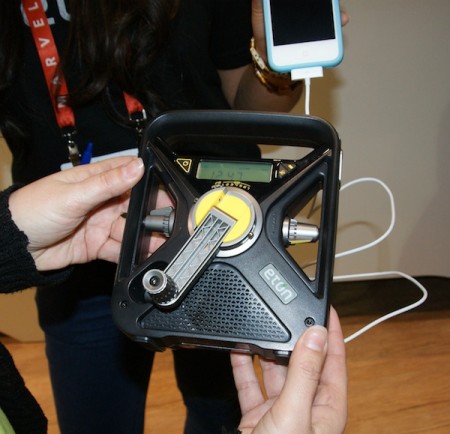
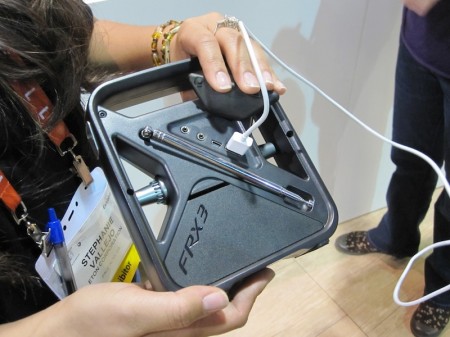
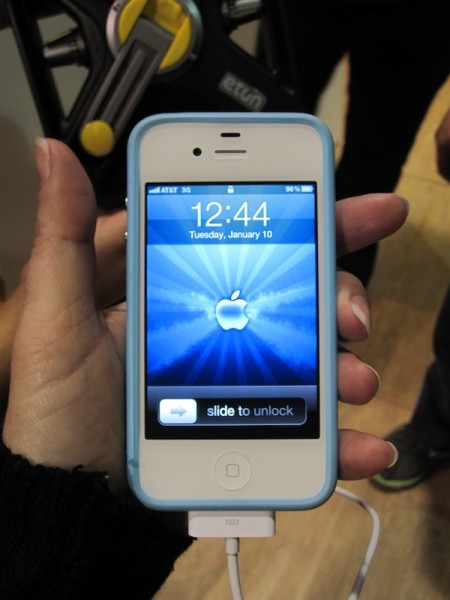
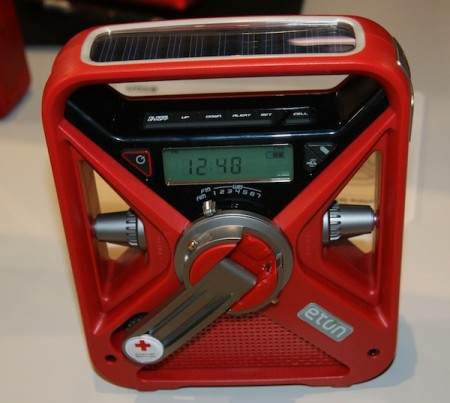
Eton got things right with their FRX3 Solar/Battery/Handcrank Charger. As soon as I saw it at their booth, I pulled out my iPhone and wanted PROOF that it would charge it. So many chargers had claimed to work with the iPhone that I really didn’t believe it would.

They gladly let me try it out.

It worked easily and the reason is quite ingenious.

Instead of depending on the user to crank the handle at the PERFECT speed to provide power to the iPhone, the Eton charges the iPhone with its battery. When you need to charge your iPhone, you must crank up their battery FIRST and then it will charge your phone without any problems.

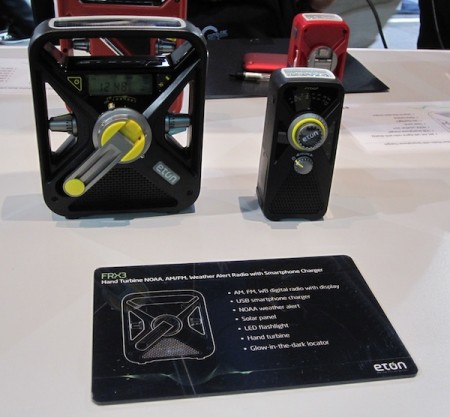
Additionally, it can trickle charge the battery with its solar panel on the top, using an electrical outlet and with AAA batteries. I was really impressed with all the options available.

Here is a video of me attaching my phone to the charger.

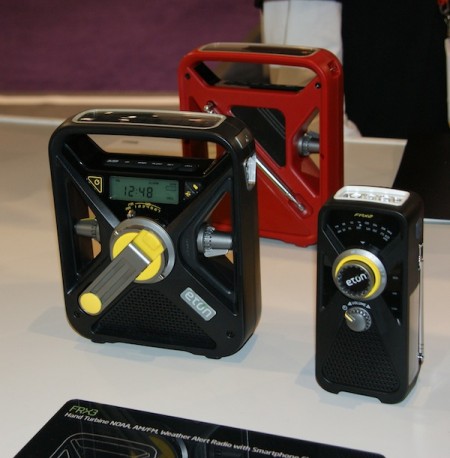
It’s a good looking unit that comes in both black and red.

There is also a radio and a flashlight included, so it doubles as a great emergency tool.

They are going to retail for only $60 bucks, but there was no word on how soon they would be available. Until then, I’m checking the Eton website every few weeks to see if I can buy it.

Hak5 did a FULL booth tour here:

August 22, 2011

Are Solar Trees In Our Future?

Filed under: Green Gadgets,Misc. Gadgets — Laura Moncur @ 10:00 am

An ancient force has been harnessing the power of the sun for longer than we have existed. It’s called photo-synthesis and trees have been doing it efficiently for eons. Why did we never consider branching our solar panels out the way a tree does? It took a thirteen-year old child, Aidan Dwyer, to notice this and he has been given a patent on the design, although, nature kind of has first dibs.

After studying how trees branch in a very specific way, Aidan Dwyer created a solar cell tree that produces 20-50% more power than a uniform array of photovoltaic panels. His impressive results show that using a specific formula for distributing solar cells can drastically improve energy generation. The study earned Aidan a provisional U.S patent – it’s a rare find in the field of technology and a fantastic example of how biomimicry can drastically improve design.

It makes sense that a tree design would be able to capture more sun than a flat surface would be. With solar panel “leaves” facing all different directions, they are more likely to be facing the sun at different times of the day. Now, if only we could allow the solar “leaves” to rustle in the wind, they would be even MORE efficient.

I’m very excited to see where this technology leads in the future!

August 18, 2011

Solar Roadways Prototype in Idaho

Filed under: Cars & Transportation,Green Gadgets — Laura Moncur @ 10:00 am

Imagine if every road and parking lot in the United States was paved with solar panels instead of asphalt. Even if they had only 15% efficiency (as the current solar panels do), they would be able to generate enough electricity to power our entire country three times over. That is the premise for the solar roadways. The roads are already there, soaking up the heat of the sun. All we have to do is design a solar panel that can do that and withstand the beating that comes from being a road.

Solar Roadways, based in Idaho is doing just that. They are building their prototype in their own parking lot. This video from YouTube explains it:

I love how they talk about how they are using the garbage from the landfills to be used as the structure of the road (3:15 mark). Since asphalt is oil based, it won’t last forever. These roads are better all around.

Via: Solar Roadways to build solar-powered parking lot | The Car Tech blog – CNET Reviews

June 3, 2010

The Case For Automating Your Windows

Filed under: Green Gadgets,Misc. Gadgets — Matthew Strebe @ 1:04 pm

We pay for a lot of power at the highest billing rate in Southern California because we have eight people living in a 5000 square foot home. When we moved in, our average summer time power bill exceeded $700 per month. Cooling the house with A/C was ridiculously expensive, and it put me on a quest to reduce power usage dramatically. I wish I could say I wanted to save the environment, but it was the money that motivated me.

So I looked at my options and came up with two potential solutions to the massive power bills: Solar, and on-site natural gas cogeneration. Either would be big, expensive projects, so in the mean time, we just ran around the house and opened the windows whenever it got hot, leaving the A/C off.

With my roof and location, I can get up to 3.5Kw of solar power generation installed for about $20K. Going through the numbers, it looks like I’ll reduce my power bill by about $220/mo. on average.
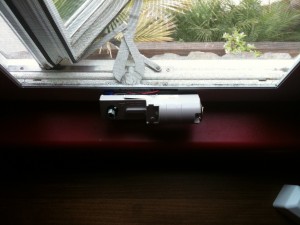
Automated WindowsAs we tired of the daily window opening and closing, I setup a simple home automation system to automate the problem. I put motors on the crank-style casement windows and used a $300 home automation controller to setup simple rules, such as “Open the windows if it’s cool outside and hot inside.” The whole setup cost less than $2000 and took me about three days to get running, most of which consisted of fishing wires through the walls to the window motors.

Then I looked into on-site natural gas cogeneration. Natural gas energy is much cheaper than electricity in California, but unfortunately cogeneration wasn’t feasible with a generator. While possible technically, the generators wear out every year. They’re noisy, and it’s not clear that they’re legal. On cost grounds, by my analysis, it would be twice as expensive as paying for power due to the short generator lifetime. I looked at fuel cells as well: Highly efficient, silent, and long-lived, but also very expensive. The payout would be fifty or so years, longer than the unit’s lifetime.

When I revisited the power bill after automating the windows, I discovered that this simple, interim solution had reduced our power bill by over $300 per month! The house was comfortable all the time, and the A/C hadn’t come on since I got the system running. A $2000 investment in home automation equipment would be paid back in just seven months, and was reducing more utility bill costs than a $20,000 solar system would.

The system automatically opens and closes the windows based on the home’s interior temperature compared to the weather outside. I have a simple program that runs on a $300 embedded controller computer (a Universal Devices ISY-99) that monitors the inside temperature, an RSS feed of the weather station where I live, time-of-day, and likelihood of rain, and makes decisions about whether and when to open or close the windows.

This setup saves me, on average, $320/mo. compared to the months when we first moved in and left the windows shut and the A/C and heat on a 68/74 degree thermostatic setting. Those months we were averaging over $740/mo. for power, and now we’re averaging $360.

Before you spend a lot of money on generating electricity, do everything you can to reduce your electrical use. Big wins for us included eliminating AC with natural ventilation and ceiling fans, replacing CRT and plasma televisions with LCD, replacing old appliances with new more efficient models, cold-water laundry, and line-drying clothes. We now have our power consumption down by two-thirds over-all, and have reached a point where adding solar may take us down to zero.

I used Truth casement window operators and controllers from wintrol.com, and INSTEON I/O Linc modules, and an ISY-99 home automation controller from smarthome.com to implement this project.

October 22, 2009

Solar Chargers for your iPhone

Filed under: Green Gadgets,PDAs and Phones — Laura Moncur @ 12:47 pm

Denver Art Museum by LauraMoncur from FlickrLast month, Mike and I went to Denver for the iPhone Developers Conference. I walked to the Denver Art Museum using directions on my iPhone to get me there. I also took lots of pictures of the exhibits at the museum using my phone’s camera. By the time I got to the top floor, my phone was dead. Not just low, but DEAD.

I am ashamed at the panic that washed over me at that moment.

I use my phone for EVERYTHING! I didn’t even know how to get back to my hotel without my phone. I couldn’t call Mike to come pick me up. I couldn’t text him to tell him I had a dead phone. I couldn’t do anything! It was the first time in YEARS that I have had a phone completely run out of battery on me. To be fair, I had taken 222 photos at the art museum and used the GPS feature to take me to the museum in the first place. Despite begging every employee at the museum, NO one had an iPod charger (surprising, I know).

Fortunately, the museum had a map of the city with my hotel on it, so I could make my way back the old fashioned way, but the entire walk back, I was cursing myself for not carrying SOMETHING with me to keep my iPhone charged. The first thing that came to mind was the Devotec Solar Charger that I reviewed last year. The minute I got back to Salt Lake City, I pulled it out of its box to see if it worked with my iPhone 3GS. Unfortunately, it doesn’t, so I looked for a replacement.

Here’s what I found:

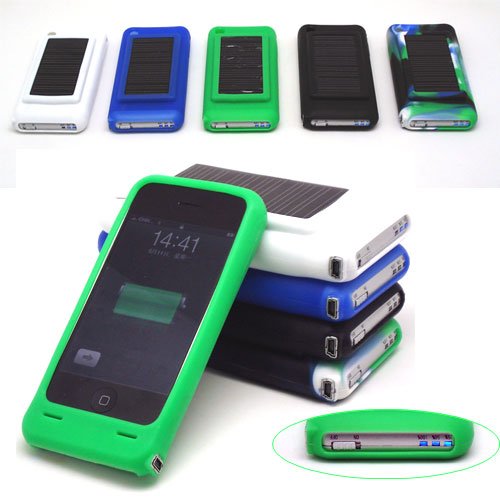
Silicone Solar Charger Battery Case for iPhones at Amazon.com

Silicone Solar Charger Battery Case for iPhones

This charger is a case that stays on your iPhone all the time. It says that it takes less than three hours to charge, but it doesn’t specify whether that is the charging time for its internal battery or the iPhone itself. I like the design of the case, but it DOES add bulk to the phone and the silicone would make it difficult to slide it in and out of a pocket. In my situation in Denver, it wouldn’t have helped me much. I was back and charging my phone in the hotel room within an hour. It might have prevented my phone from dying completely, but it wouldn’t have helped keep it alive to navigate me back to the room.

Additionally, there is no guarantee that this will work on an iPhone 3GS and no reviews from people who had bought it. I decided that this one wouldn’t work for me.

Apple iPhone 3GS Solar Battery Portable Recharger at Amazon.com

Apple iPhone 3GS Solar Battery Portable Recharger

This charger is VERY small and the internal battery can also be charged by plugging it into a wall. Unfortunately, the specifications don’t say how long the charging time is. Since the solar panel is so small, it MUST be less than three hours (which is the charging time of the previous solar charger with a bigger panel). There are no customer reviews, so buying this charger is like shooting in the dark. I decided against it as well.

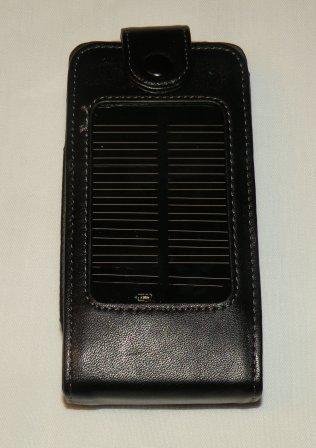
Leather Solar Charger Battery Case for iPhones at Amazon.com

Leather Solar Charger Battery Case for iPhones

I just couldn’t bring myself to buy this one because it was so UGLY. Not only does it add alot of bulk, but you have to open it up to answer the phone. I’m usually struggling to get to my phone in time already. I don’t need the added impediment of trying to get a case open as well. Once again, there is no guarantee that this will work with the iPhone 3GS and no stated charging times.

Despite all my searching, I was unable to find a solar charger that was nearly as portable as just carrying around the USB charger and a retractable cable. I’m positive that the museum would have let me plug into a wall plug for a few minutes, at least long enough for me to call or text my husband in desperation. Sadly, solar technology isn’t quite ready for those desperate dead iPhone emergencies. I’m sure that when it is, Apple will build it into all of their products. Until then, I’ll just carry around a petite charger in my purse instead.

June 15, 2009

Mission One Electric Motorcycle

Filed under: Cars & Transportation,Green Gadgets — Laura Moncur @ 5:00 am

Yves Behar was the designer who brought us the OLPC, the Leaf lamp and the Jawbone headset. He has now teamed up with Forrest North to create the Mission One motorcycle. It’s a good looking electric motorcycle that can go up to 150 mph with twice the range of any other electric motorcycle. The following video shows them introducing it at the TED conference this year.

Here are the stats on the Mission One:

Max Speed: 150 mph
Distance on a single charge: 150 miles
Regenerative braking: The batteries are charged when you use the brake.
Charging Time: 2.5 hours when using a 220 volt plug. 8 hours when using a 110 volt plug (standard home plug).
Sales Price: $68,995

Mission One electric motorcycle

Their advertising says that it has zero emissions, but there is a little something I learned in science class in seventh grade: There Is No Such Thing As A Free Lunch. That motorcycle is charged by electricity. If you get all your electricity from solar, wind, hydro-electric or geo-thermal power, then, YES, there ARE zero emissions. If however, your local electrical plant uses natural gas or coal (which is more than half the electricity generated in the U.S.), then there ARE emissions. They are coming from the electrical plant in your area. This is true of ALL electric vehicles that claim to have zero emissions.

With a price tag of $68,995, you could afford to buy three or four Honda motorcycles or MANY electric scooters. Unless you need to drive 150 miles to work every day, the Mission One is an expensive way to show everyone how green you are.

Next Page »

Powered by WordPress
(c) 2003-2017 Michael Moncur, Laura Moncur, Matthew Strebe, and The Gadgets Page