The Gadgets Page

November 14, 2015

3Doodler 2.0 Hat Embellishments
Filed under: Misc. Gadgets — Christy Strebe @ 5:05 pm

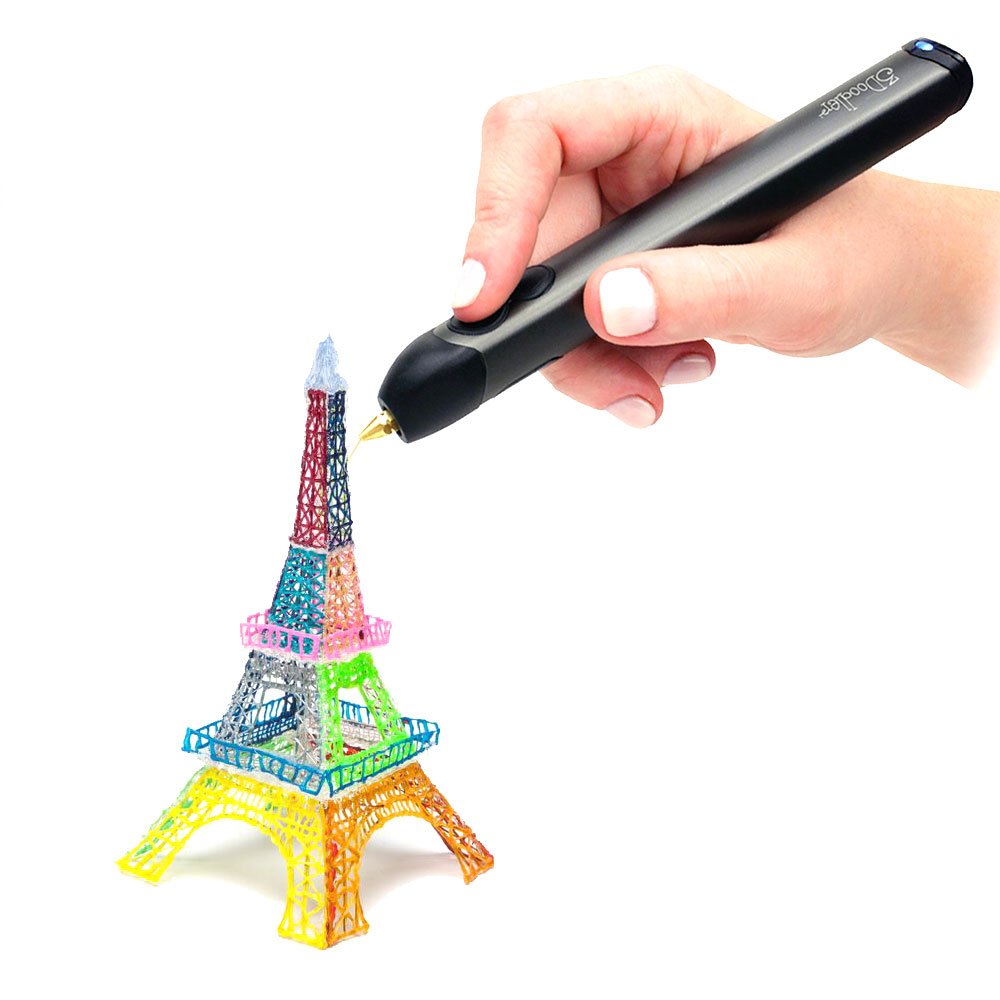
3Doodler 3D 2.0 Printing pen at Amazon.comAt our house we are a little obsessed with 3-D printing, so it was no surprise when the 3-Doodler showed up under the Christmas tree last year. While you won’t get the same product quality out of the 3Doodler as you would a 3-D printer, it definitely has a niche in the crafting world and if you have never played around with 3-D printing it is a good place to start. There is very little set-up, no need to make 3-D CAD drawings, just heat it up and decide what you want to try to make. My kids love to play with this and I have used the 3Doodler for a variety of crafty projects.

You do need to get used to the different types of medium. If you want to draw straight up, have your finished object be a little flexible or if you are joining plastic objects together ABS is your best bet. If you want your object to stick to paper, glass, metal or fabric PLA is your best option. PLA will also allow you to stretch it for a few seconds after it comes out of the 3Doodler and comes in a larger variety of colors than ABS. Both plastics are good for building objects freehand.

My very first 3Doodler design was an embellishment for a hat. I had an hour before we went to a Derby party and this was my inspiration: Grace Du Prez’s award-winning Peacock Hat.

3Doodler Inspiration from The Gadgets Page

To change color in the 3Doodler you need to run all of the previous color through and then you will have a section where the two colors mix. Because I wanted different colors in my feathers, I decided to build all three at once and just free handed the feathers and color placement. I did need to go back and add extra support to the stem of the feather as well. Here was my finished product:
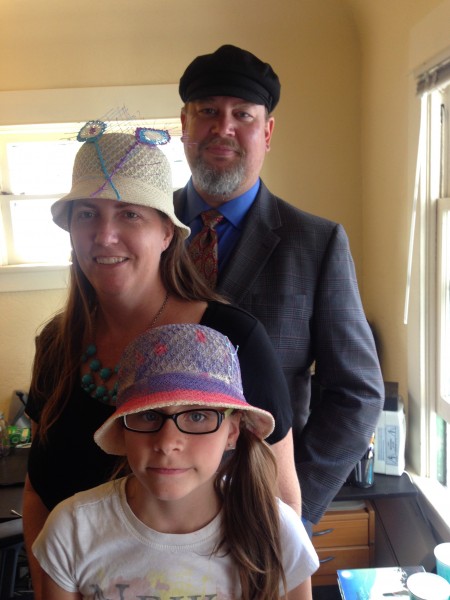
3Doodler Hatt Embelishment from The Gadgets Page

I was able to make three feathers in an hour and add them to my hat just in time. My hand was a little cramped at the end but with the hold button feature the 3Doodler 2.0 has it was much better than the previous model.

I have been extremely happy with the 3Doodler. What I thought was just a toy has become a worthwhile designing tool.
July 29, 2015

The BASICS Notebook Kickstarter: Back To Paper?!

Filed under: Misc. Gadgets — Laura Moncur @ 8:00 am

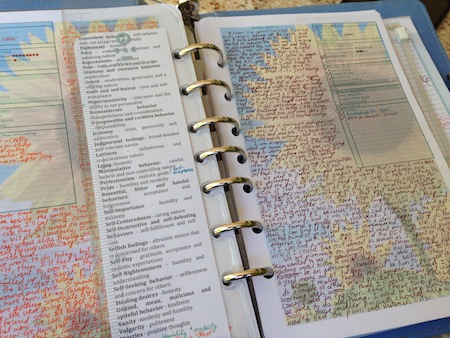
The BASICS Notebook from The Gadgets PageI saw this Kickstarter and it really appealed to me. It’s a paper planner.

About three years ago, I went back to paper for my to-do lists. I still have my scheduler in my iPhone because that works much better than paper because it can sound an alarm to remind me. To-do lists, however, are woefully inadequate on the iPhone. I have yet to find a to-do list program that worked as good as Ecco Pro for the Palm did for me in the Nineties.

The BASICS notebook looks good, but it’s not what I need. It’s an undated date book with not enough room for to-do lists and journaling. For years now, I’ve been printing up my own journal pages on paper using Excel. That is what the loss of Ecco Pro did to me. It sent me back to paper; both for journaling and to-do lists.

I have recurring to-do items that I do every day to keep myself from going insane. While those things might work for me, they might not work for you, but unlike the BASICS people, I’m willing to share mine with you for free.

These pages print up on normal 8 1/2″ X 11″ paper. You set the date on the first day of the “Front” and the rest of the days will update for the month. Then you print the Front, put it into your printer and print the Back. Cut them in half and you have a month’s worth of journal and to-do lists. Change them however you want they are yours to play with.

Journal and To-Do Pages to Download from The Gadgets Page

You can make them pretty like I did by adding a picture and reducing the opacity to about 35%. You can trim the edges and use a six-hole punch and they will fit in that old Franklin Planner from the Nineties. Go back to paper? Yes. Until they create a to-do list for the iPhone that actually WORKS, I am stuck with paper.

July 27, 2015

Saved by Selfie Stick

Filed under: Misc. Gadgets — Laura Moncur @ 8:00 am

This video just made me cry. I have a huge fear of being pulled in by the undertow because it happened to me when I was a little kid in a lake up in Wisconsin. This girl, was filming herself and her family when the riptide hit. Fast forward to the 2:13 mark to watch it.

At the 2:25 mark, when her panicked voice said, “I can’t,” I felt that terror of being pulled under the water again. Her father grabbed her by the selfie stick and got her away from the riptide. Fortunately, the life guards swooped in and saved all three of them. You can see the point when the life guard got to her because she let go of the stick and it just swung by the lanyard.

The next time I feel that self-righteous rage at someone filming themselves with a selfie stick, I will remember this and relive the horror of being pulled under the water, knowing that one time, a selfie stick saved someone’s life.

Via: Girl Caught in Riptide Saved by Selfie Stick – POPSUGAR Tech

July 21, 2015

The Henn-na Hotel: A Robot Staffed Hotel in Japan

Filed under: Misc. Gadgets,Robots — Laura Moncur @ 9:10 am

I love robots, so the idea of a hotel staffed by robots sounds like ten kinds of awesome.

Robot Staffed Hotel in Japan from The Gadgets Page

And then I remember what kind of robots we’re talking about. These are like Disneyland Robots who give automated speeches. They don’t look at me, recognize the RFID tag on my hotel key and say, “Hello, Laura! How are you today?” They tell me where to go if I want to find the swimming pool.

The Luxor hotel had this back in 1993.

These camels bragged about the hotel and all the fun things to do there. I’m sure the dinosaur and woman in the pill box hat do the same thing. At least Henn-na has robots deliver food to you.

Of course, they keep getting stopped for photo ops, so I think I’d just prefer to get my food myself.

In the end, I think robots are cool and every step toward their development is a step in the right direction. I just wish I was to that House of the Future time when the robots were actually helpful and interactive.

Via: Meet the faces of Japan’s first robot-staffed hotel

February 10, 2015

12 Tips for Successful 3D-Printing

Filed under: Misc. Gadgets — Matthew Strebe @ 7:14 am

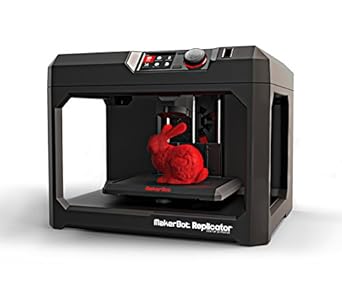
MakerBot Replicator Desktop 3D Printer at Amazon.comSo you bought a fused form filament (FFF) 3D printer such as a FlashForge or a MakerBot, and your first print turned out great!

But it’s just gone down hill from there, right? Here’s what went wrong and how to get back on track with great prints.

  • A dirty nozzle attracts filament clinging, which ruins prints. Clean your nozzle with acetone if it has accumulated gunk. Learn how to remove your nozzle and clean it by soaking it in acetone (nail polish remover) to remove old printing filament. Use an appropriately sized drill bit (usually 0.4mm) with your fingers to clear the nozzle if necessary.

  • Any dirt, moisture, or oil (such as fingerprints) on the build bed surface will prevent first layer adhesion, which will ruin your prints. Cover the build bed in an even layer of blue painter tape for an absolutely clean surface every time—but don’t touch the tape! In fact, tear off the first foot or so and discard it, because the outside of the roll has collected dirt, moisture, and oils just sitting around. When you apply the tape, touch only the left and right edges, and overlap the build board so you only have clean tape for the build.

  • Print in ABS. ABS has by far the best viscosity and flow characteristics for 3D printing, and low to no smell. PLA is the next best bet. All other plastics, including HIPS, Polystyrene, PVA, and blends are experimental and for those who know how to disassemble and reassemble their extruders only.

  • Use a heated build-bed. If you don’t have one, get one; most 3D printers have them or have an option.

  • Use an enclosed printer. Not only is it safer and quieter, but also keeps the entire chamber warm and prevents drafts from cooling your model unevenly, which can cause curling and warping. Don’t have an enclosure? Print under a clear plastic box.

  • Level your build bed every time. For ABS, the correct nozzle-to-bed thickness is .2mm, the thickness of a piece of regular printer paper. Adjust your printer’s nozzle to bed thickness by putting the paper on the bed moving the nozzle to at least three different points, and adjusting the bed height until they paper can move with resistance between the bed and the paper.

  • Print only one object at a time, in the center of your bed. While your printing software will allow you to build multiple objects at once, it doesn’t save you any time and it dramatically increases the probability that when something goes wrong, it will go very wrong. Printing one object at a time keeps you involved and watching the printer. Heated beds are also cooler towards the edges, making adhesion in those areas trickier.

  • Save large, complex, overnight builds for when you are an expert. These builds have a lot of opportunity for problems, and if they happen while you aren’t around, you could wind up with a clogged nozzle and a difficult extruder repair. Wait until you’ve got 3D printing down pat before you do your 3D print of Rome.

  • Be ready to pluck off any extrusion from the nozzle just before your print. A “snot nosed” extruder at the beginning of a build can drag around plastic and ruin what would have been a great build. As the extruder heats up, it may extrude a little plastic. Be ready to pluck that away with some tweezers before the print starts.

  • Take your printed part off the bed right after its done printing, or reheat the build bed to remove them. It’s much easier to remove a warm item. If you damage the painter’s tape at all while removing an object, take it off, wipe the bed surface with a paper-towel and acetone to clean it, and then re-apply painter’s tape.

  • Configure your printing software to print a “fence” around the first few layers of the print. The fence provides early warning of any adhesion problems and insulates the warm air around the nozzle to keep the first few layers viscous and more likely to adhere. You may also want to look into printing rafts or “mouse-ears” on corners to help them adhere, but I’ve never found that necessary—fences work well and aren’t connected to the object so they don’t require finishing.

  • Watch the first ten layers of your build directly and stop the build if there are any adhesion, curl, movement, or nozzle extrusion problems. These problems will not correct themselves; they’ll accumulate until you clog a nozzle-requiring repair. Once the first ten layers are down correctly and look good, the rest of the print is highly likely to succeed.

The difference between a good printout and something you have to throw away are these few details. When you pay attention to these few details, you can guarantee a good printout every time.

February 6, 2015

Show Me Love Internet Rage

Filed under: Misc. Gadgets — Laura Moncur @ 12:39 pm

I adore this Coca-Cola commercial about Internet Rage:

I wish that all we had to do was to spill half a bottle of Coke in an ISP provider’s servers to change the hate to love.

January 19, 2015

3D-Printed Prosthetic Arm: E-nabling The Future Gives Hope

Filed under: Misc. Gadgets — Laura Moncur @ 8:00 am

I had NO idea that this was happening:

There is an entire community of people who are designing 3D printed arms for children who are missing limbs. THIS!!! This is the reason why 3D printers are important. This is why they are going to change the world, not all that Cory Doctorow stuff. Being able to print up a prosthetic arm for your child and when he grows up a bit, being able to print up a bigger one is AMAZING!!

It’s all because of E-nabling The Future:

They have a variety of designs available online here:

THIS is the future that I want to see of 3D printing, not silly little toys and gadgets. THIS changes childrens’ lives!

Via: 3D-Printed Prosthetic Arm Inspired by Star Wars | POPSUGAR Tech

January 12, 2015

CES 2015: Winbot Window Cleaning Robot

Filed under: Misc. Gadgets,Robots — Laura Moncur @ 8:00 am

I really like this window cleaning robot from Winbot.

What the boating industry needs is a robot like this to clean the bottoms of boats now that it’s not longer legal to paint them with copper paint. But for now, I think every person who has difficult to wash windows will be happy to have one of these robots.

January 9, 2015

CES 2015: Toshiba Communication Android

Filed under: Misc. Gadgets,Robots — Laura Moncur @ 8:00 am

I love robots, so any time I get a chance to see a famous one in person, I’m right there. I heard that Aiko Chihira was at the Toshiba booth and I really wanted to see her. She is supposed to speak Japanese sign language. Here is the video I took of her:

I was hugely disappointed because the way they had her set up, she was NOT an android. If you listen to my video, you can hear me try to talk to her like she is my buddy. It wasn’t until I saw on the screen that it said, “She is not interactive. She does not respond to the audience’s motion or voice.” She was just like the animatronic pirates on the Pirates of the Caribbean ride at Disneyland, repeating a presentation over and over.

Ever since I was a child, I have wanted to have a robot friend, but the longer I live, the more I realize that my hopes will probably never be realized. Here is a longer video of her from the CEATEC show in Japan:

When she tries to smile at the beginning of the video, it just looks wrong, somehow. When she starts doing the sign language, she looks awkward. Disneyland’s Abraham Lincoln looked just as creepy almost fifty years ago. I am beginning to doubt that I will ever get my robot friend before I die.

January 5, 2015

New Options for Light Therapy

Filed under: Misc. Gadgets — Michael Moncur @ 2:09 am

Winter means lack of sunshine, and for many, unhappiness due to seasonal depression. Fortunately there are a wide variety of light therapy devices–basically high-powered lamps. My usual recommendations are the desk lamps and floor lamps from Full Spectrum Solutions. They’re not too expensive, look great as decorative lighting, and put out a very strong 70W fluorescent light.

3 sizes of CF bulbs

More recently we discovered a new lower-cost option. Most experts recommend 50-100 watts of fluorescent light, and with the decreasing cost of Compact Fluorescent (CF) bulbs, they’ve become the least expensive way to get a bright light. If you have a light fixture or lamp that will fit one or more of these, it’s a great way to get light therapy at low cost:

  • 23 and 26-watt CFL bulbs (“100W replacement”) are available at department stores at a low price. Three or four of them are a pretty good light therapy option.
  • If you’re willing to order bulbs online, there are higher-wattage options available. For about $10 the Feit Electric 42-watt CFL is about as bright as a 200W incandescent, and we’ve found the 42W fits into many typical lamps.
  • And for a single-bulb solution, costing about $12, Amazon has a huge 85-watt CFL bulb that actually outshines the 70W light therapy lamps.

We were very impressed by the 85W bulb, which fits into a standard light socket, but there are two issues:

  • Size. It’s huge–almost comically large–and won’t fit into very many light fixtures. However, many cheap desk lamps and hanging lamps will work with it just fine. We recommend getting a bulb first and then finding a lamp that will hold the giant bulb. (Picture above shows this bulb, the 42W bulb, and a typical 13W CF bulb)
  • Brightness. This is a BRIGHT bulb, and unlike the Full Spectrum Solutions lamps linked above, it’s not dimmable. Unless you have a huge shaded lamp, you won’t want to hang it in the corner of your living room and keep it turned on. (Notice how it protrudes above the shade in our lamp.)

Despite those caveats, if you shop around for a lamp that fits, you can turn one of these into a light therapy lamp that would have cost you thousands of dollars 10 years ago for under $30. And if you do use it in your living room, it will certainly be a conversation starter!

Next Page »

Powered by WordPress
(c) 2003-2017 Michael Moncur, Laura Moncur, Matthew Strebe, and The Gadgets Page